Just how much does it cost to bake your own bread? I'll just start with the cost of ingredients, and figure that I'm making a basic 1 1/2 pound loaf.
Flour-18 oz (1 1/2 lbs)
instant yeast 1 teaspoon
salt 3 teaspoons
Thursday, November 30, 2006
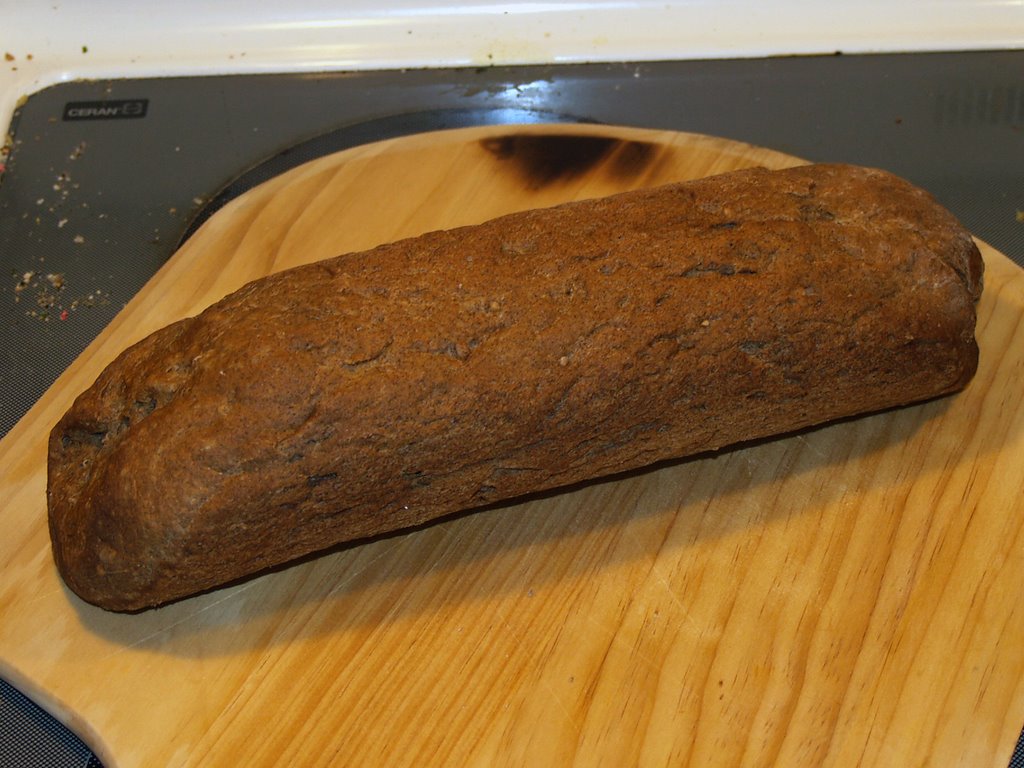
Loaf #10, buckwheat flour and a tube loaf pan
So, I tried 2 new things at once. The first was a cylindrical glass loaf pan that probably dates back to the 70's, the other was using about a third buckwheat flour in the dough. I used the basic bread recipe as a base, with bread flour in the preferment and the rest had 8oz of buckwheat flour and 8 oz bread flour in the rest of the dough. I also added 2 tablespoons steel cut oats to the flour before adding the preferment, and a packet of unflavored gelatin. It kneaded and rose nicely, I formed a loaf and shoved it into the middle of the tube. Not knowing how big it would proof, I actually divided the dough and put 1/3 of it on a nonstick mat next to the tube pan.
 The blob loaf is covered in corn starch, which I made way too thick. Forgive me, it wasn't the smartest move I've made while bread baking. I considered it a throwaway piece anyway.
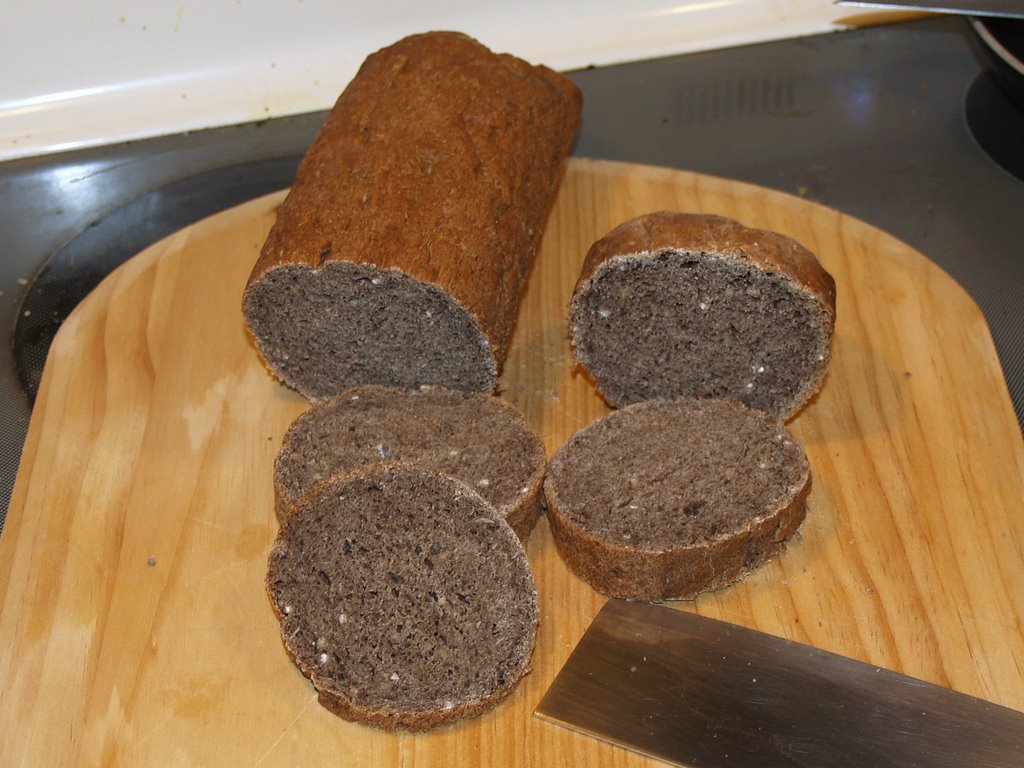
After baking, I removed the loaf from the tube pan. I muse admit, I was a bit disappointed because it looks pretty much like my Italian loaves in shape.

The result was a nice dark loaf with plenty of soft texture and spots of white steel cut oats for contrast, the loaf was nicely round but my Italian and French loaf pans work as well for nearly round loaves without the breakable factor. I thought that the bread was a bit sour for my taste, but my wife liked it. I'll try it again with less buckwheat flour next time.
 The blob loaf is covered in corn starch, which I made way too thick. Forgive me, it wasn't the smartest move I've made while bread baking. I considered it a throwaway piece anyway.
After baking, I removed the loaf from the tube pan. I muse admit, I was a bit disappointed because it looks pretty much like my Italian loaves in shape.
The result was a nice dark loaf with plenty of soft texture and spots of white steel cut oats for contrast, the loaf was nicely round but my Italian and French loaf pans work as well for nearly round loaves without the breakable factor. I thought that the bread was a bit sour for my taste, but my wife liked it. I'll try it again with less buckwheat flour next time.
Saturday, November 25, 2006
Flour varieties
I have a habit of grabbing various flours that I'm not familiar with just to see how they work as a yeast bread. Right now I have several to be used, and decided to post links to a few for future reference. Even the ones that don't work well in yeast breads are commonly used in flat breads, which is another project to tackle.
Buckwheat flour. The relevant points to me, it can be combined with up to an equal amount of wheat flour to make a very nutritious bread, and it goes rancid if improperly stored. So I think the buckwheat loaf will be coming up soon.
Teff flour. Again, the relevant points for me are that it's highly nutritious, but I can only use a limited amount in yeast bread to maintain a good rise and texture. I figure a few tablespoons tossed in should work well. It's also good for a type of Ethiopian flat bread.
Amaranth flour. The important points for me, it can be mixed with wheat as 25% of a yeast bread loaf, again very nutritious and good for flat breads.
One of my goals is to make a loaf with whole wheat and other flours that is very good for me, and tastes good with a decent rise. I'll start making some basic loaves with these flours included and see what happens. My millet and flax meal loaves are tasting good, and tonight I baked loaves with an egg yolk in the dough to see how that affects the texture and longevity of the bread.
Friday, November 24, 2006
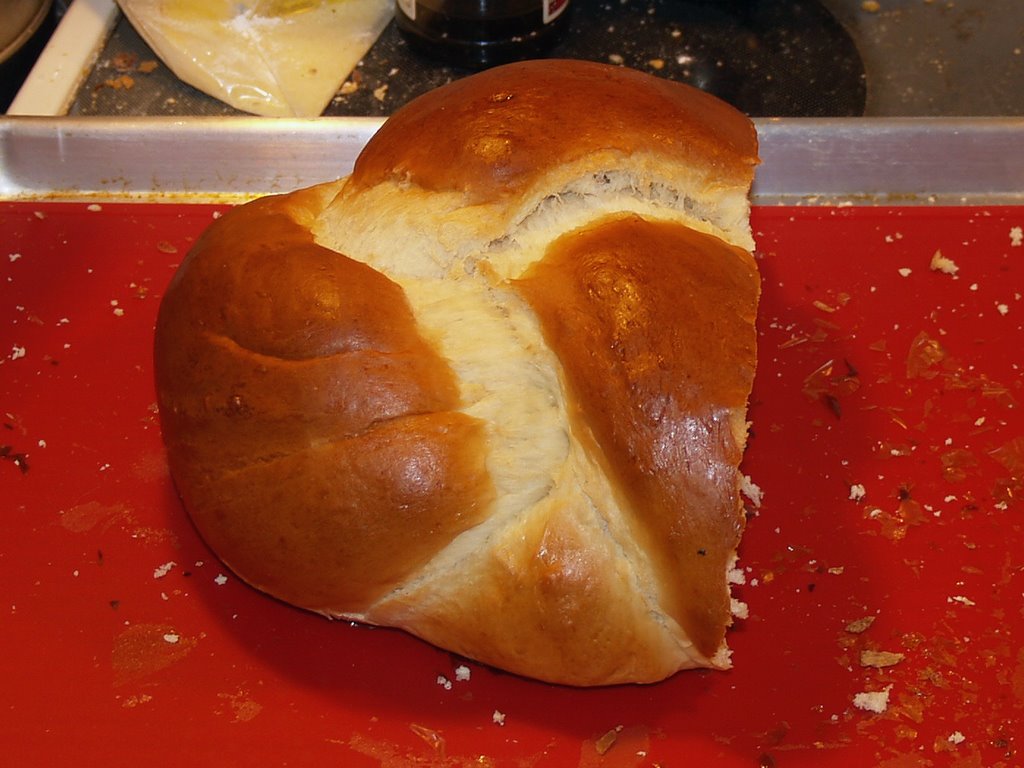
Loaf #9, Spiced challah and French Toast
 I followed my previous challah bread recipe, although I also added a teaspoon of cinnamon, and half a teaspoon of nutmeg and cloves. The result is a wonderful spiced bread, tastey but not overly sweet or spicy.
 After slicing up the entire loaf and putting it into a plastic bag I purchased online, I made a simple French toast batter from 1/2 cup milk, 1 teaspoon vanilla and 2 eggs. Dunk the bread, and toss onto a lightly buttered skillet for about 2 minutes on a side over medium heat.
I did a quick three strand braid on the loaf and baked it in a loaf pan, the results were pretty good although they could have been neater. An egg glaze was used too.
Musings on bread texture and longevity..
Since making the challah bread, I've discovered that it just lasts a lot longer on the shelf than the other breads. Minimal research indicates that the egg yolk may be given the most credit for this, but I'll have to do more research. Awhile ago I found this page which gives a list of additives for bread recipes and what they do, and now is my chance to experiment. I'll put the link with the list on the blog, and start playing with additives.
My ultimate goal is to make a whole grain (or mostly whole grain) bread that is light, moist and tastes good.
My ultimate goal is to make a whole grain (or mostly whole grain) bread that is light, moist and tastes good.
Tuesday, November 21, 2006
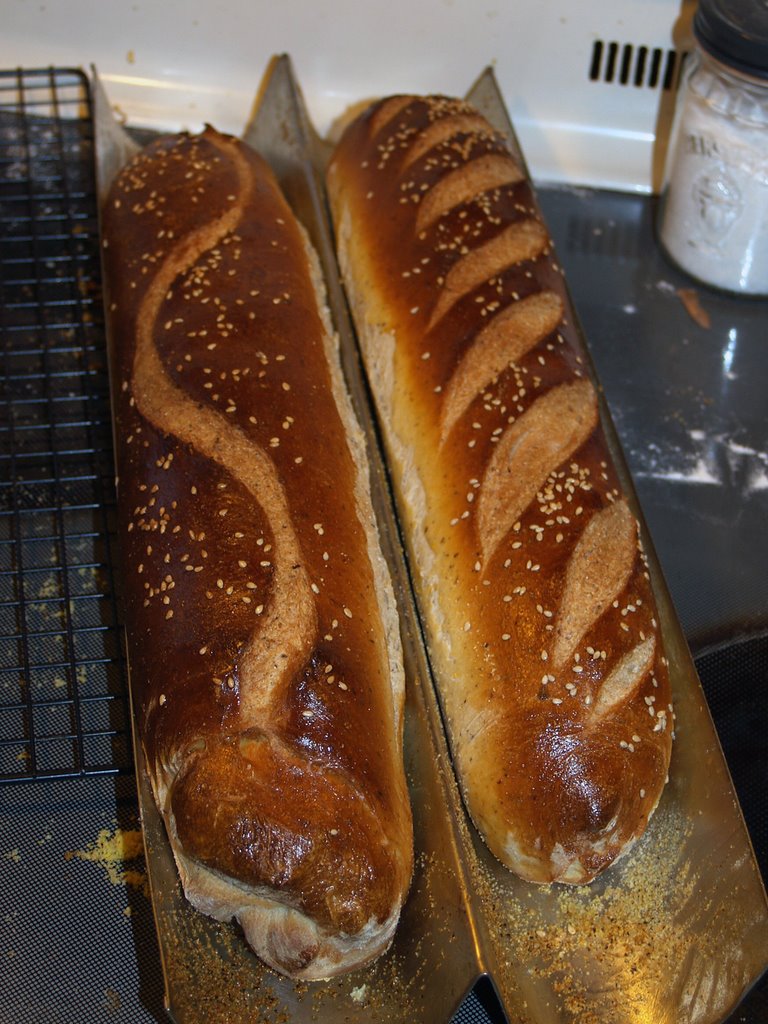
Loaf #8, Millet flour and flax meal
So, for a change of pace I decided to make something a bit different. I started with a preferment
Preferment
8oz high gluten bread flour
15 oz cold water
2 tablespoons sugar
1/4 teaspoon yeast
This I left at room temp overnight. In the morning/early afternoon it was a wonderful spongy froth. In a mixing bowl I mixed
1 pound (16 oz) bread flour
3 teaspoons salt
1 teaspoon instant yeast
1/2 cup millet flour
2 tablespoons flax meal
My new lidded containers work well for proofind on a warm day, so I didn't do my usual method of putting them in the oven with a pan of hot water, instead capped them and left them on the counter. Two hours and the dough doubled, I shaped them into two French loaves on a French loaf pan (sprayed with nonstick spray and sprinkled with cornmeal). This I put into the oven with a bowl of water hot from the tap, just enough to keep the loaves from crusting over. After an hour proofing, I brushed the top of both loaves with a beaten egg and sprinkled with sesame seed (just for looks, with some pro bakers think is not good unless it helps the flavor. I just didn't feel like sprinkling it with more flax seed). It went into a 450 degree oven for 25 minutes. The top browned nice and crunchy, the flax seed made the bread itself just slightly darker than it would usually come out, and it has a slight nutty smell/taste that I find appealing. I may bring up the amount of millet flour in my next batch to see how it affects the flavor.
Overall I call this loaf a success.
Thursday, November 16, 2006
Loaf #7, Challah 1.0
 First of all, I'd like to apologize for there only being half a loaf. The first memory card I used to take pictures was corrupted, but I'd sampled the loaf repeatedly before finding this out. So here we have half a loaf of challah, a traditional Jewish bread with all sorts of variations possible. I used a cookbook that I found at Half Price Books, which has many recipes and a whole lot of reading about various traditions behind the bread. I highly recommend this book if you want to make challah, or just like to read about family histories as they pertain to loaves and traditions.
For this loaf I used one of the more basic recipes, simplified it a bit and did my own methodology for blending because they wanted to include a few more steps than I did. So here's the recipe.
Challah Bread
1 1/2 pounds (24 oz) bread flour
1/3 cup sugar
1 1/2 teaspoons salt
1 teaspoon instant yeast
3 tablespoons vegetable oil
2 eggs
2 teaspoons vanilla extract
9 oz cold water
First mix the flour, sugar, salt and yest in the bowl. Add in the wet ingredients, but hold back a few tablespoons of the egg for the glaze. Mix on low for a few minutes to get the ingredients together. Cover and let it hydrate for 15-20 minutes, then knead on low-med speed for about 8 minutes. Put in an oiled bowl, place in oven with a pan of hot water, let proof for 2 hours. The hot water gives the yeast a warm, moist enviornment to do it's work. Don't turn on the oven light, I think the heat from the bulb can cause the dough to crust while just the hot water prevents it from crusting (this is based on one experience, I haven't done an in depth study to prove it's true). After the first proof, dump dough onto floured surface and press down with your knuckles. Fold the dough over on itself and repeat another time or two so the dough stiffens a bit. Shape the dough (I did a simple braid), place on a pan or in a greased dish and put back in the oven. Dump the water and replace with fresh hot water. Let proof for about an hour. Glaze with remaining egg. Heat the oven to 350 degrees, bake the loaf for 35 minutes. If you are baking smaller loaves or rolls, decrease time to about 20 minutes. Let cool.
One thing I did different with this loaf was to use a silicone mat instead of baking parchment. It worked well. They range from $10-20, and are reusable. Parchment is still good to have around, because those mats won't go over a French loaf pan as smoothly. Mine were purchased at Wal-Mart for about $10 for a half sheet and quarter sheet set.
One thing I will mention, is that although I adore the No Knead Bread method, I'd never try it with challah bread since it contains eggs. I don't know if it would go bad sitting out for 24 hours, and I'm not about to try.
Wednesday, November 15, 2006
Loaf #6, No Knead Sourdough
 Just out of curiosity I made some of the No Knead Bread but with 2 oz less water so it's a proper dough, then after about 18 hours I shaped the dough onto my french loaf pan and baked for 20 minutes.
 The dark loaves were supposed to be pumpernickel, but they turned out bitter. I used too much cocoa and/or caraway seed, and maybe they don't go together in a loaf. But the light ones I made with the sourdough starter. 1 pound high gluten bread flour, about 3 tablespoons sourdough slurry and 10 oz water. Mix until combined, cover the bowl and let rise about 18 hours. Shape and bake 20 minutes for a French loaf, probably 30 minutes for a boule. The result was a wonderfully soft, slightly sour loaf.
My next project will be challah bread, which will be a nice change of pace.
Tuesday, November 14, 2006
A note on how I count loaves....
It occurred to me that someone might wonder why I'm showing multiple loaves in a post but only counting one loaf. I consider for the purposes of this project that I only do one loaf a day that counts, but I may do multiple experiments on the same day.
In my opinion a loaf only counts if there is something new about it, either in the way I created the dough, or the process I used to bake it. Doing 100 loaves of plain white bread in boule form would be easy and i could probably crank them out in under a month. But actually learning something new about how bread works? That's the goal.
I also plan to do something special every 10 loaves, an overview of the different breads I've made and celebrate the event by sharing the best bread I can make with friends.
Loaf #5, sourdough and new loaf pans
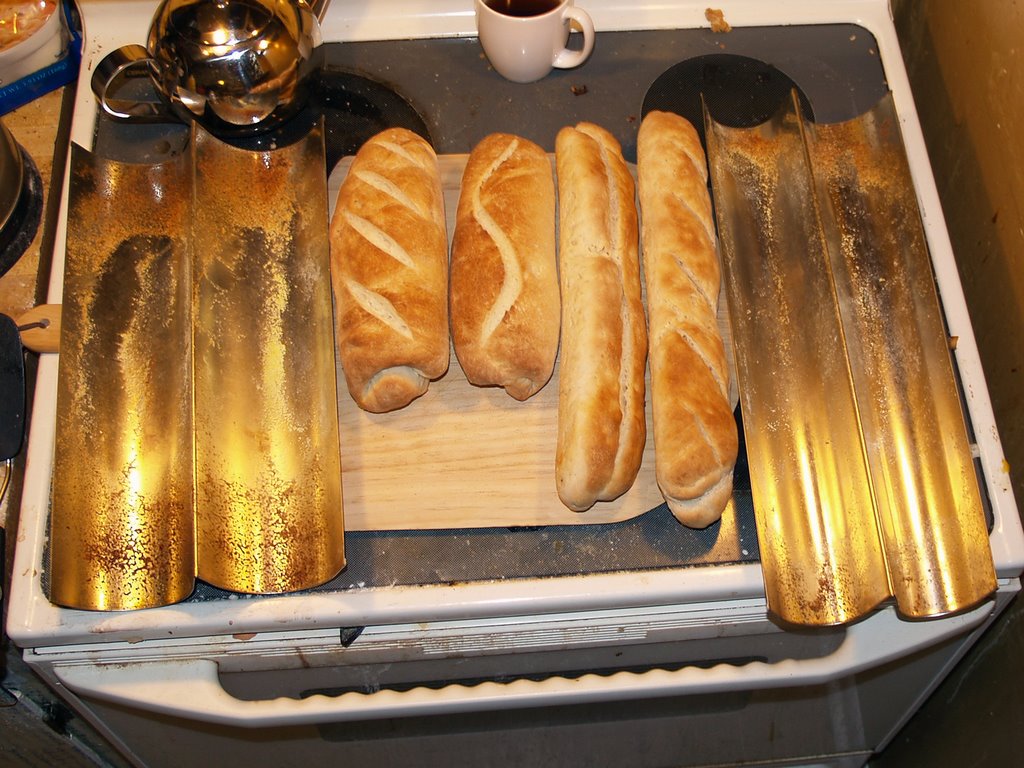
Yesterday I received my loaf pans, so after cultivating a large batch of sourdough slurry I made a batch with regular bread flour and another with high gluten flour. The high gluten flour rose faster and was shaped into French loaves (on the right) and the regular bread flour became Italian loaves (on the left). I sprayed the pans with nonstick spray and sprinkled cornmeal on it, which did a nice job. next time I'll probably just use parchment paper for easier cleanup. The loaves formed beautifully, but between over baking them and probably not hydrating them enough the outside ended up a bit tough. The sourdough taste was pretty good, though, so it's worth another try.
Next time I try using the loaf pans I'll limit baking time to 20 minutes or so, since they seem to get done so much faster in this form.
When I made the dough, I just put about 2 cups of flour and a teaspoon of salt into a bowl, then dumped in enough slurry to form the dough. Not very scientific, but it worked ok except for the over baking.
Loaf #4 and Food Slicer review
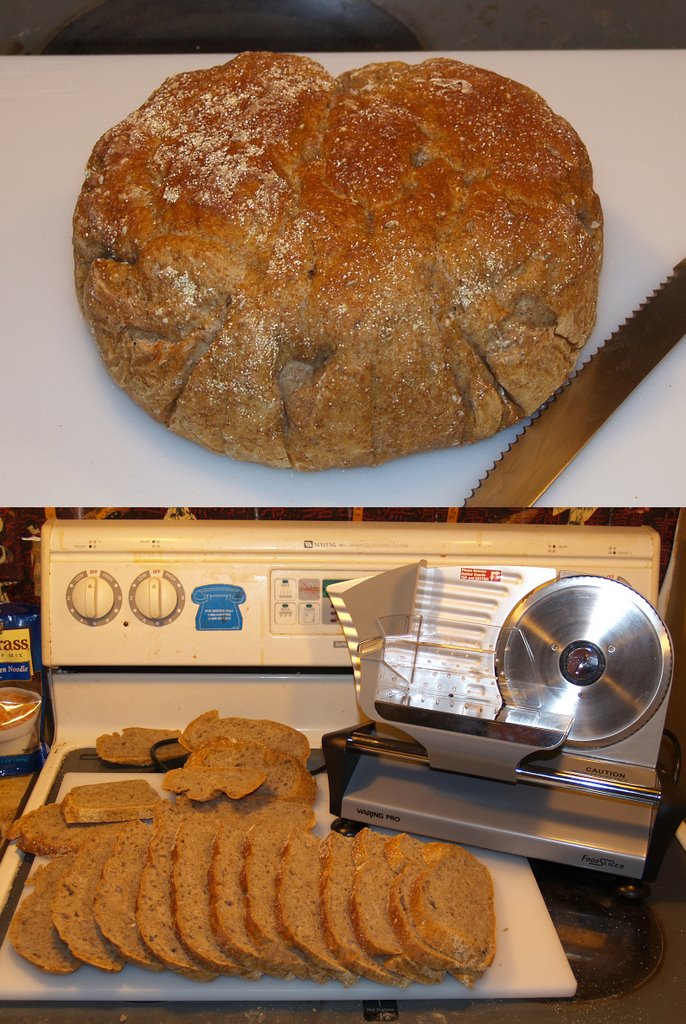 To try something a bit different I tried the No Knead Bread, this time with 1/3 rye flour and 2/3 all purpose flour and 2 tsp caraway seeds. I also did it as a double batch, and kept it on parchment paper after shaping so I could hold onto the corners and drop the whole thing into the pot so it would hold more of it's shape. The result was a tasty loaf, although pretty big. I'm thinking a regular size loaf baked in a round pan would be nice.
I also got a food slicer (bottom of the picture), which works real nicely for cutting up the loaves quickly and into even slices. The only drawbacks in my opinion is that if the loaf is too tall or long it may not fit against the cutting blade, and have to be cut smaller to fit. Not worth the investment if you only do the occasional loaf, but for the avid baker it's a nice addition to the kitchen.
Friday, November 10, 2006
No Knead Bread take Two, Loaf #3
 I tend to binge on new recipes until I feel that I get them "perfect", thus I did 2 more loaves of the No Knead Bread. From this I learned a couple of things. One is that rye and spelt wheat flour as one third of the bread flour total makes for a good loaf with this recipe. Another is that bench proof time (the second rise after the dough is formed into the loaf shape) has it's limit. The loaf on the far left went into the oven after the first was done, so it sat out for 45 minutes longer than the first loaf (which proofed about 2 hours, maybe 2.5 at most). When I tossed it (the rye loaf, if you were curious) into the pot the dough was already spreading out, and kinda blobbed over onto its side. It came out less uniform and the air bubbles are much smaller. Tastes darned good, though. I figure one more experiment before I put this recipe onto the back burner for awhile. The only real difference in methodology was that instead of wrapping the dough in a floured towel like the recipe said, I put them on cornmeal covered parchment paper and put them into a plastic container that kept them warmer and prevented the dough from drying out.
The loaf on the far right was my first experiment with Oliver the Sourdough starter. It rose wonderfully, but I didn't put very much starter into the dough so it's a very mild sourdough flavor. I'm going to make a much larger amount of sourdough starter before tackling it again, and do a bit more research on the use of sourdough in loaves since baking with sourdough is new to me.
Although three loaves were completed, I only consider the spelt wheat bread to be the loaf to count for the 100 Loaves project, as the other two were experiments for future breads.
Wednesday, November 8, 2006
No Knead Bread, Loaf #2

A friend sent me a link an article about No Knead Bread. So what did I do? Went out and bought an enameled stock pot so I'd have an oven safe container with a lid the proper dimensions for this recipe. The recipe itself is simple, although I translated it from 3 cups flour to 1 lb of bread flour,and 1 5/8 cup water into 13 oz. With only 4 ingredients, it's easy. So my 4 year old and I yesterday mixed together
1 lb bread flour
1 1/4 teaspoon salt
1/4 teaspoon instant yeast
13 oz water
After bringing it together we covered the bowl with plastic wrap and set aside to proof overnight. The recipe said 12-18 hours minimum, 24 hours even better.
Today I shaped the loaf around 10am, generously covering it with corn meal to prevent sticking. It's a really wet dough, I warn you now. Around 12:30pm I put the stock pot and lid into the oven for preheat. I gave it about 20 minutes to thoroughly heat to 450 degrees, then removed the pot from the oven and tossed in the dough, recovered and put back.
20 minutes into the baking it smelled wonderful. 30 minutes in I removed the lid for the last 15 minutes. Put the lid on the stovetop for cooling, it was handleable 15 minutes later when the bread came out. I dumped the loaf onto a cooling rack and set the stock pot aside for cooling. After an hour I photographed and cut into the loaf, revealing large air bubbles and a slightly chewy texture, quite good. I am ranking this among my favorite recipes, both for the ease and for the flavor of the bread.
Recipe archive
Recipe: No-Knead Bread
Adapted from Jim Lahey, Sullivan Street Bakery
Time: About 1½ hours plus 14 to 20 hours’ rising
3 cups all-purpose or bread flour, more for dusting
¼ teaspoon instant yeast
1¼ teaspoons salt
Cornmeal or wheat bran as needed.
1. In a large bowl combine flour, yeast and salt. Add 1 5/8 cups water, and stir until blended; dough will be shaggy and sticky. Cover bowl with plastic wrap. Let dough rest at least 12 hours, preferably about 18, at warm room temperature, about 70 degrees.
2. Dough is ready when its surface is dotted with bubbles. Lightly flour a work surface and place dough on it; sprinkle it with a little more flour and fold it over on itself once or twice. Cover loosely with plastic wrap and let rest about 15 minutes.
3. Using just enough flour to keep dough from sticking to work surface or to your fingers, gently and quickly shape dough into a ball. Generously coat a cotton towel (not terry cloth) with flour, wheat bran or cornmeal; put dough seam side down on towel and dust with more flour, bran or cornmeal. Cover with another cotton towel and let rise for about 2 hours. When it is ready, dough will be more than double in size and will not readily spring back when poked with a finger.
4. At least a half-hour before dough is ready, heat oven to 450 degrees. Put a 6- to 8-quart heavy covered pot (cast iron, enamel, Pyrex or ceramic) in oven as it heats. When dough is ready, carefully remove pot from oven. Slide your hand under towel and turn dough over into pot, seam side up; it may look like a mess, but that is O.K. Shake pan once or twice if dough is unevenly distributed; it will straighten out as it bakes. Cover with lid and bake 30 minutes, then remove lid and bake another 15 to 30 minutes, until loaf is beautifully browned. Cool on a rack.
Yield: One 1½-pound loaf.
Loaf #1, Basic White Bread in a Round Pan
 Welcome to the beginning of the baking marathon. Loaf #1 is made from the Basic Bread Recipe. I used the Pyrex dish to the left of the loaf to bake it, just a spritz of nonstick spray for easy removal. My boule loaves haven't been working well recently, which is a good enough excuse for me to work with pans to form the loaves for now. I did four slashes across the top of the loaf and didn't bother with a glaze. All flour was regular bread flour, and I usually bake after it's proofed about an hour but gave this one an extra 20 minutes because I could tell the yeast had a little more work to do.
Yesterday I ordered two French bread pans. They appear to have the least expensive French bread pans available, although the reviews on the perforated nonstick ones have me ready for a bake off in the future.
I also received some sourdough starter that dates back to the Oregon Trail, 1847. You can get it too for the cost of a self addressed stamped envelope. A group of sourdough enthusiasts are preserving the sourdough starter, which is what I really call preserving a culture (insert groan.)
Saturday, November 4, 2006
Preferment and the basic recipe...
The most important part of a good loaf of bread is preferment. This is a mixture of flour,water, sugar and yeast that is allowed to sit at least overnight in the fridge. The preferment is best used at least 12 hours after being made, and I've used it up to a week later with no problems. My basic preferment is
8 oz bread flour
15 oz water
1 Tablespoon sugar
1/4 teaspoon instant yeast
Mix together in a container that allows for expansion (I mix them together with a whisk), cap with a loose fitting lid or with plastic wrap and a few tiny holes poked through the plastic.
Your preferment will probably separate into a layer of flour on the bottom, water in the middle and a layer of spongy foam on top.
The Dough.
1 pound (16 oz) bread flour
1 teaspoon instant yeast
2 teaspoons salt
preferment
When it's time to make the dough, put 1 pound (16 oz) of bread flour into the bowl of your mixer. Add 1 teaspoon instant yeast, 2 teaspoons salt and the preferment. Put in your dough hook and mix until the dough just comes together, about 5 minutes. Cover with a towel and let rest 15 minutes to let the water saturate the dough, then turn on medium speed for 5-8 minutes to knead the dough.
While the dough is kneading, bring a teakettle full of water to a boil. Pour about 3-4 cups of hot water into a bowl in the oven and close the door. This creates a warm, moist enviornment that the yeast loves. When the dough is through kneading, transfer it to a greased bowl (I sprits a bowl with nonstick spray, then do a quick spray over the dough). Put the dough and bowl into the oven with the hot water and let proof (rise) for 2 hours.
After 2 hours, it's time to shape the dough. I will cover shaping techniques later, so I'll assume you can form a basic boule or put it in a loaf pan for now. Once the dough is shaped, refresh the hot water in the oven, and put the loaf back in for 1 hour. When the hour is up, remove the loaf and start preheating the oven (mine takes about 10 minutes to preheat). While the oven heats, scramble and egg and brush it over the surface, then use a serrated knife to make slashes on the top of the loaf. Bake at 400 degrees for about 35 minutes.
That is my standard bread recipe. Variations include substituting part of the bread flour with rye or whole wheat flour, the addition of other flavorings, and using different glazes.
Now you have the starting point I usually use for my bread. A better explanation will follow. Tonight I made 2 batches of preferment for use later this week.
Subscribe to:
Posts (Atom)